
How to Teach French Adjectives - an organized introduction
For this post, I wanted to share the short lesson intro that I find to be super helpful when I teach French adjectives.
It has really improved my students’ understanding of adjective endings and helped them to organize their notes more efficiently too!
I hope that it’s useful for you and gives you ideas to bring to your own classroom!

With so many different endings, exceptions, and ways to change the singular forms to plural, I find that the easiest way to keep students from getting frustrated is to make it as organized as possible from the very first lesson!
I have found that the best way to do this is to organize the whiteboard / blackboard so that students can VISUALLY see the differences as you teach.
(When I give hand-outs, I also organize them this same way to drive home the different adjective endings.)
So, without further ado (oh yes… ado!), here is the intro that I like to use for the first French adjectives lesson of the year!
THE INTRO: BRAINSTORMING
For the introduction to the lesson, I bring out the celebrity pictures! I always start with my personal favourite, Robert Downey Jr, and suggest some adjectives to describe him.
After I say a couple, I start asking the students to help me out. *I invite them to do this in English or in French to encourage participation!*
As they give the adjectives, I write them onto the board in different boxes that are ONLY for others with the SAME endings.
I divide them into the following categories:
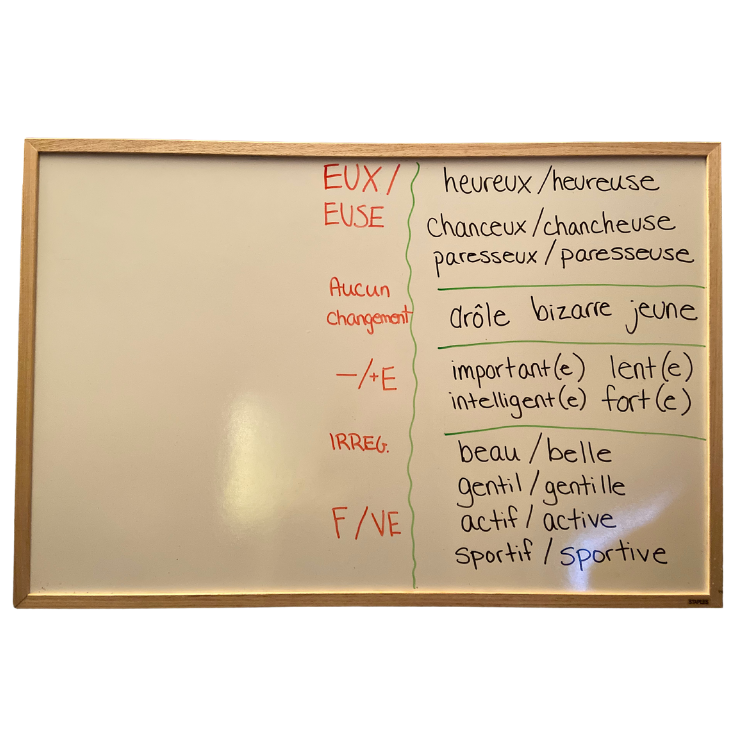
- EUX/EUSE
- – / E
- same for both genders
- other
(I intentionally do not write the headings on the boxes so that I can get students to recognize the patterns on their own! We discuss this after the brainstorming section.)
THE BOARD:
After 3-4 adjectives about Robert Downey Jr, I switch up the celebrity. Usually I use magnets to stick the people to the board. Next, I bring out someone that excels in a different area (Simone Biles, Elon Musk, etc.)
I make sure that all the adjectives given are divided properly and written in French off to the side of the board. This leaves the middle of the board open for me to give examples and to hang the pictures!
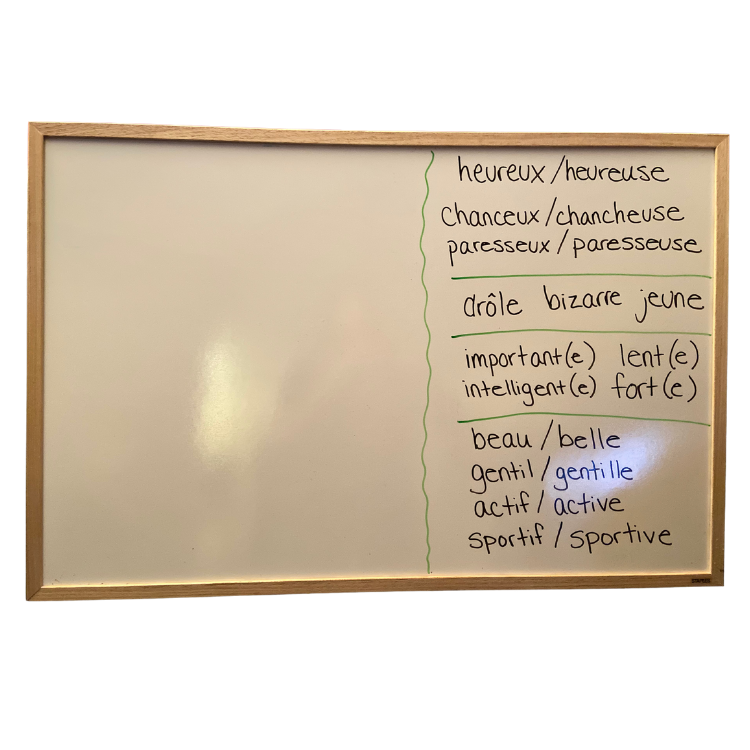
Once the board has a number of examples (4-5) for each section , I ask my students to find the patterns in the boxes and I write the rules beside each one.
This is something that really makes students feel good about themselves and they learn the rules BETTER than if they had simply been given them ahead of time. Having that “aha!” moment really makes a difference!
Before the next part of the lesson, I hand out a vocabulary building worksheet that has the same categories so that students can add the adjectives into the correct boxes as they come across them in our lessons!
And the board looks something like this:
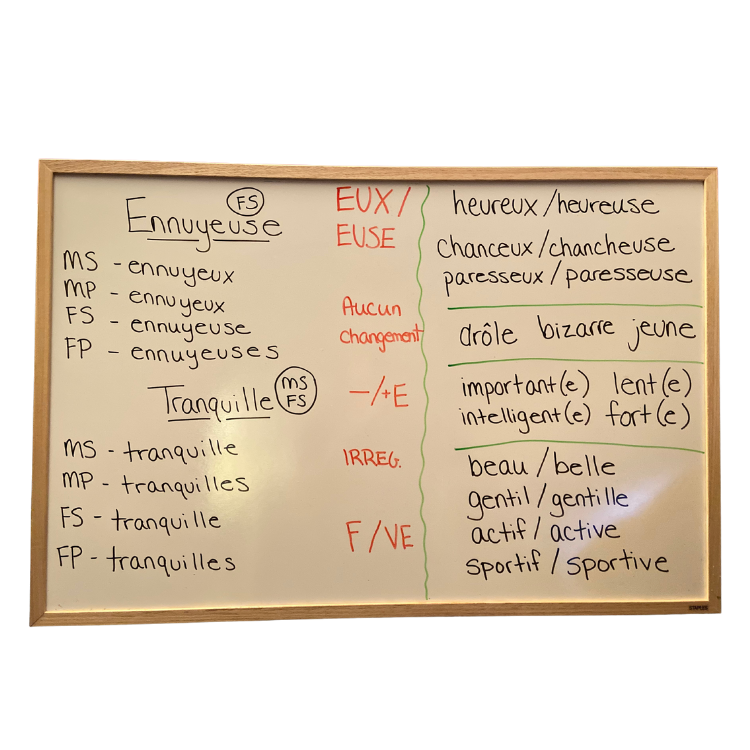
For practice before we move on, I give students adjectives in only one form. They then have to tell me what the other forms are!
(Example: I give only “heureuse” – they have to tell me the other 3 based on the category that it falls in.)
I write the answers on the board for 4-5 adjectives before giving the students a few minutes to complete the worksheet on their own.
My board is getting pretty full at this point! And it looks something like this:
Next, we take up the answers from the worksheet. Students can use it as a guide for the activities during the rest of the class and for the future!
And that is the last part of my intro! After that we move on to speaking activities and further practice.
Thanks so much for reading and I hope that this little intro helps you in your French adjective teaching!
Looking for more French teaching ideas? Check out my TOP 10 best French warm-up activities for your classroom!
